In This article, we will describe how to install a self-signed SSL certificate in cPanel.
Installing a self-signed certificate
You can install a self-signed SSL certificate on your CyberDeveloperBD Hosting account for testing and development purposes. To do this, you need to create a private key and digitally sign your own SSL certificate in cPanel.
To create and install a self-signed SSL certificate, you must follow these step by steps:
Step 1: First Log in to cPanel.
Step 2: Then scroll down to the “Security” section. Find the “SSL/TLS” icon and click on it.
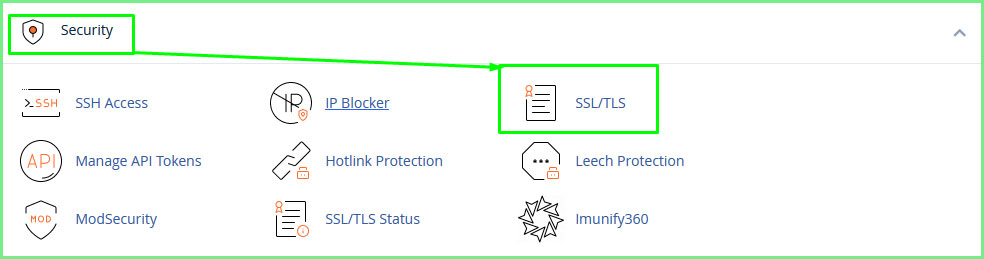
SSL/TLS
Step 3: On the right side under Private Keys (KEY), click “Generate, view, upload, or delete your private keys” option. Click on it and Private Keys page will appears.
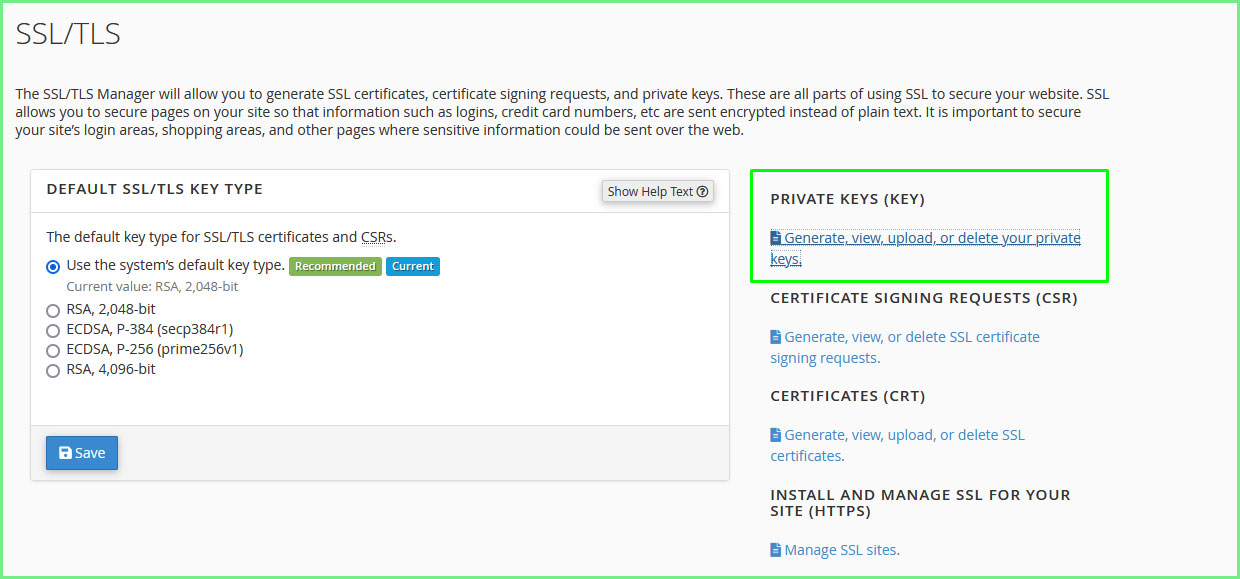
Generate, view, upload, or delete your private keys
Step 4: Next Under Generate a New Private Key, confirm that the Key Type is set to “RSA, 2,048-bit”.
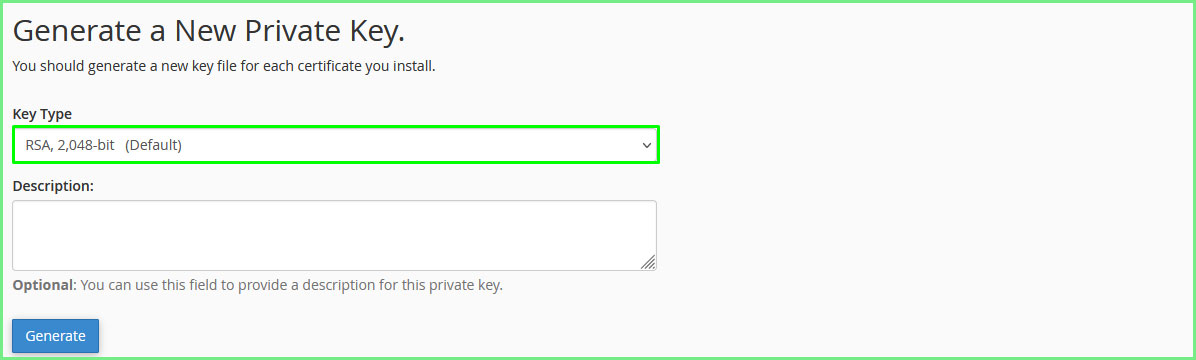
RSA, 2,048-bit
Step 5: In the Description text box, type a descriptive name for the key, such as Self-signed cert key.
Step 6: Click to the “Generate” Button. cPanel generates and displays the private key.
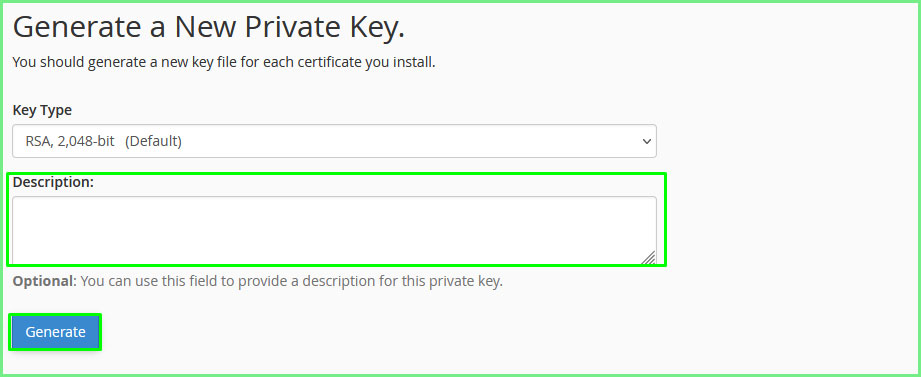
Generate
Step 7: For next step Click “Return to SSL/TLS”.
Step 8: Next on the SSL/TLS page, under Certificates (CRT)option, click to the “Generate, view, upload, or delete SSL certificates” manue. Click on it and Certificates page will appears.
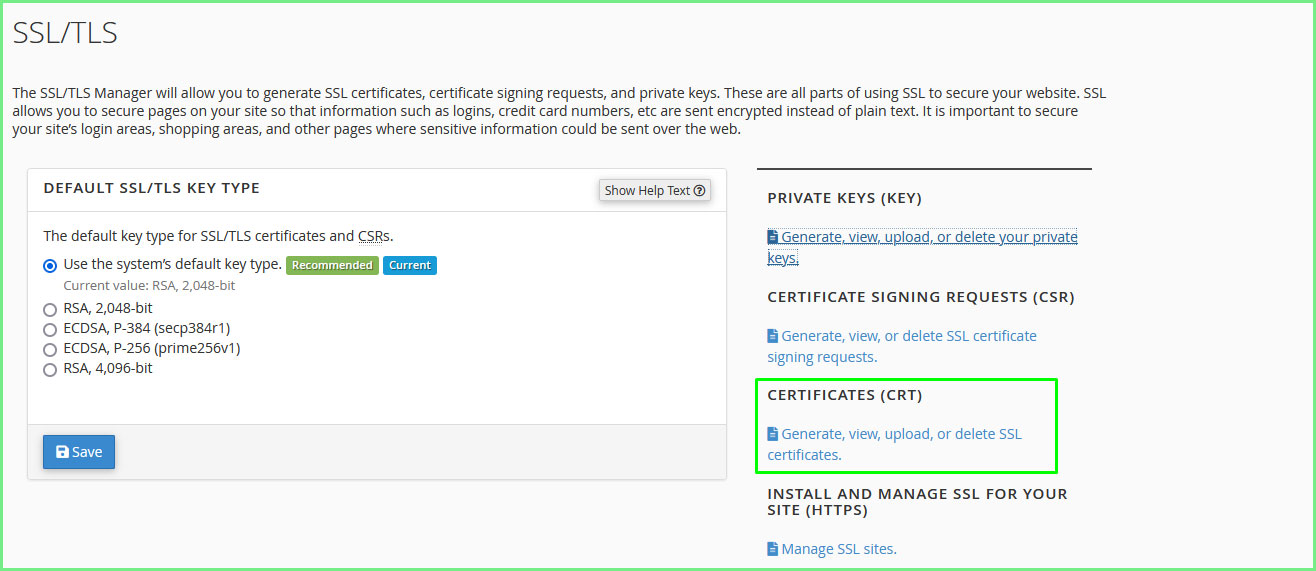
Generate, view, upload, or delete SSL certificates
Step 9: Under Generate a New Certificate, in the “Key list” box, select the description for the private key that you generated in step 6.

Key list box
Step 10: Next step in the Domains text box, type the domain that you want to secure with the self-signed certificate, such as “test.yourdomain.com”.
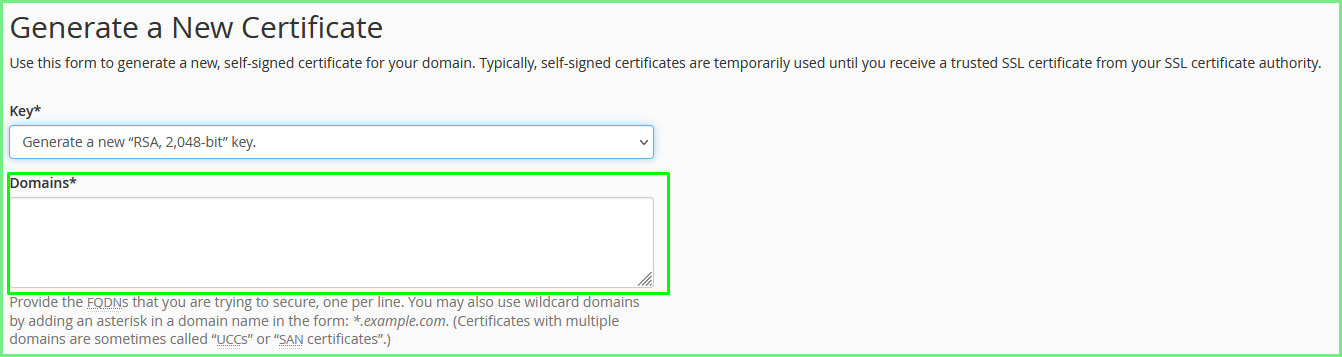
Domains text box
Step 11: Complete the remaining fields to details for the certificate.
Make sure you use the correct two-letter country code (for example, US or BD).
Step 12: Then Click to the “Generate Button”. cPanel generates and displays the self-signed certificate.
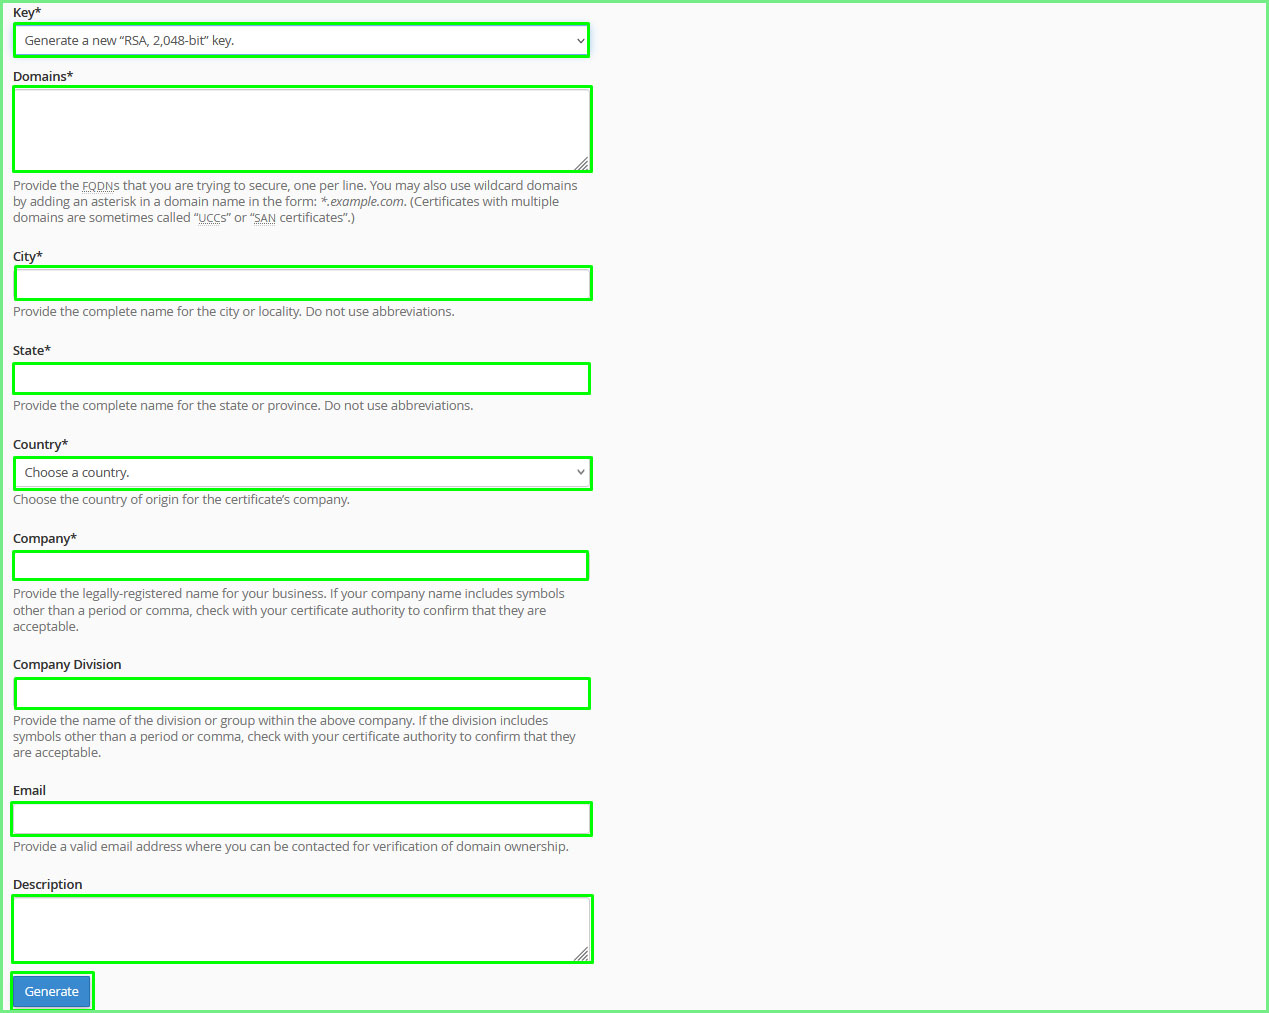
Generate
Step 13: Again for the next step Click “Return to SSL/TLS Button”.
Step 14: Next From the SSL/TLS page, under Install and Manage SSL for your site (HTTPS), click “Manage SSL sites”. Click on it and Manage SSL Hosts page will appears.
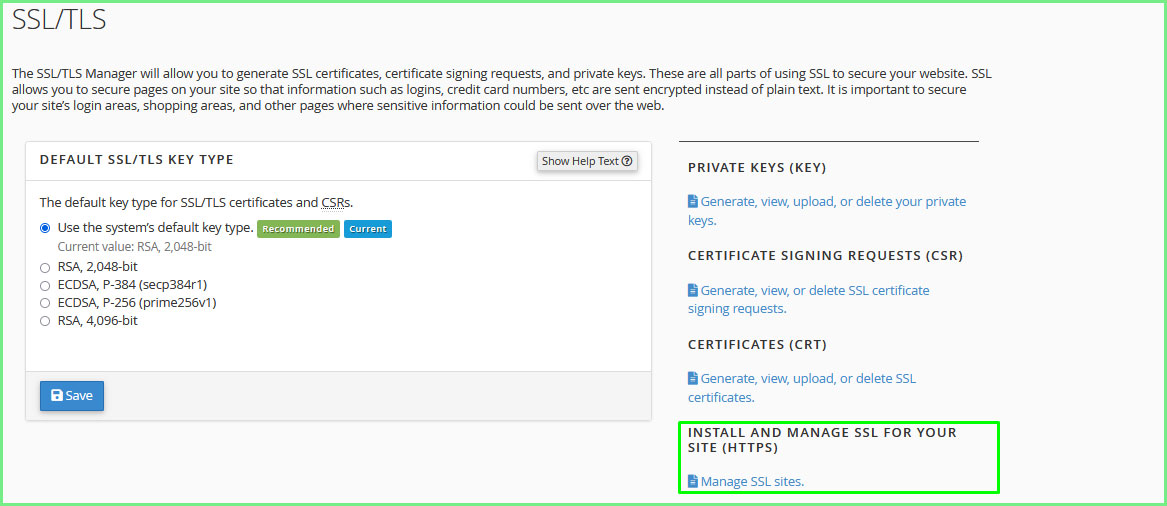
Manage SSL sites
Step 15: Under Install an SSL Website, click “Browse Certificates”, select the certificate you generated in step 12, and then click Use Certificate. cPanel fills in the Certificate (CRT) and Private Key (KEY) fields automatically.

Browse Certificates
Because this is a self-signed certificate, the Certificate Authority Bundle (CABUNDLE) field remains blank.
Step 16: In the “Domain list” box, select the domain you want to secure with the certificate.

Domain list
Step 17: For complete the installation Click “Install Certificate”. cPanel installs the certificate on the server and enables SSL. When the process is complete, you receive an SSL Host Successfully Installed message.
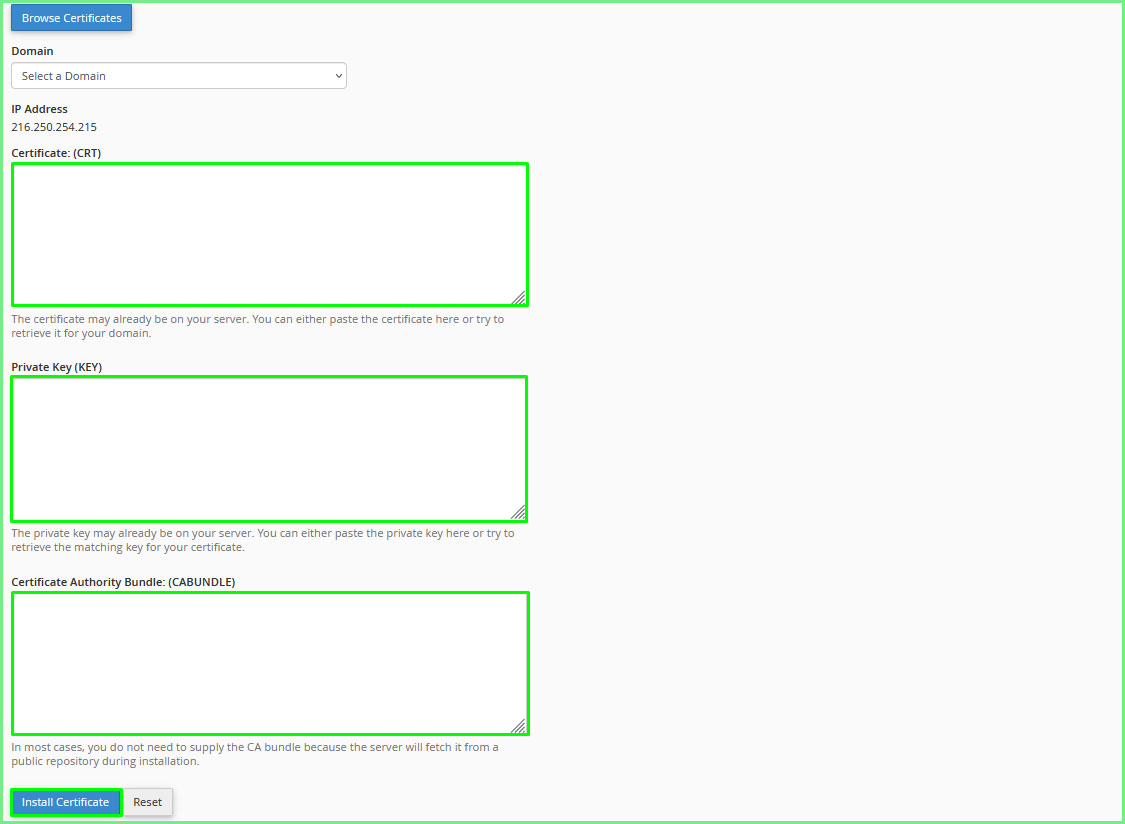
Install Certificate
Step 18: Click OK. You can now securely access the specified domain by using the https:// prefix in a web browser, but you will receive a warning message about the self-signed certificate.
Did you find this article helpful? Then you’ll love our support. If you need any other help or support then contact us for more information. We are always here to help you. Click here to visit our today’s hosting plan.